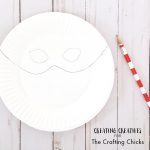
Print and cut out the Paper Plate Mask Template. Then roughly line the curved top of the template to the curved top of your paper plate and trace around it. It doesn’t need to be perfect, it’s mainly to get the shape and eye hole location.
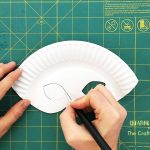
Use scissors to cut the bottom of the mask out, and a utility knife and cutting mat to cut out the eyes.
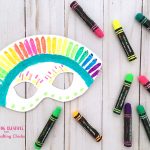
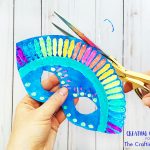
Time to color! Take your oil pastels and make some patterns on your mask. Use any patterns you may already have on the paper plate to emphasize parts of your mask, then add lines, dots and other patterns to it. You could even add magical powers or ‘buttons’. Remember to leave to white space too! This is important for the next step, though obviously not required, just fun!
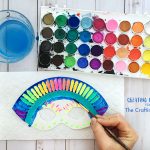
Once you’re done coloring you’re going to use the watercolors to paint over your mask and color in the white areas. The thing I love about this is that the oil pastels resist the watercolor so you can paint right over it without worrying about covering up your beautiful oil pastel patterns.
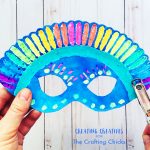
For a final touch you can trim the top of your mask. We did it for one of our masks and left one of our masks round, like the edge of the paper plate.
Finally, punch a hole on either side of the mask and thread through some elastic, string or even pipe cleaner to fit to your child’s head.