Optional: other materials like pom poms, scrap fabric, puffy paint…
Instructions
Print out the craft templates. You will need 4 trees for this craft.
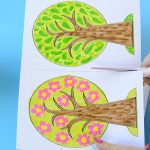
Once you have your templates it’s time to get creative and color them all.
Color one tree for each season. Try to get as creative as possible.
Once all is colored cut the sheet of paper in half (along the dashed line). You can naturally cut them in half before you start to color.
Now we need to fold the trees in half!
There are two ways of doing it. You can do it before you start cutting – there is a dashed line at the top and at the bottom of the tree indicating where the middle is. Fold along that line.
You can also cut out the trees first and just fold them in half when they are already cut out.
Fold in half again, this time with the colored side inside.
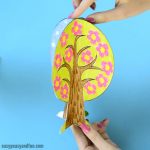
Fold all four trees. Take the spring tree and apply glue on one side (as shown in the image bellow).
Take the summer tree and glue it on top of the spring one. Press down for the glue to set.
Now take the fall tree and glue it on top of the spring and summer tree.
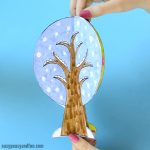
Continue with the winter tree.
Now to make a four seasons tree craft, apply the glue on the “winter” and glue the winter and the spring together.